Change Upload Size Google Click to Deploy
Themeisle content is free. When y'all purchase through referral links on our site, we earn a committee. Acquire More than
Interested in learning how to install WordPress on Google Cloud?
With a cloud hosting provider, y'all go unmatched scalability. Cloud servers can suit to loftier-traffic surges, and in almost cases, you pay by the hour – so y'all know exactly where your money's going.
In this article, we'll discuss when information technology might make sense to utilise Google Deject for WordPress hosting. We'll talk about pricing, then teach you how to install WordPress on Google Cloud with a step-by-step guide.
Let's get to it!
Why yous should install WordPress on Google Cloud
Google Cloud is a collection of services that enable yous to host your website or application on the search behemothic's datacenters. With Google Deject, you can get access to this hardware in the grade of virtual machines (VMs).
Unlike a regular VM or a virtual private server (VPS), cloud hosting services use a collection of machines to store your data. We call information technology the 'cloud' because it's immensely scalable. You can ever add more resource to your cloud, which makes it platonic for projects with high-functioning needs.
With Google Cloud, y'all get all the regular advantages of cloud hosting and more than. As you might imagine, Google Deject uses height-of-the-line infrastructure, making it a powerful – and expensive – pick.
The costs of using Google Cloud
Unless you're completely new to running a site, you lot'll have an idea of how much hosting costs. You can now observe some excellent hosting plans starting at less than $5 per month if yous commit to a long-plenty contract.
At this price point, you're getting shared servers, which shouldn't come up equally a surprise. All the same, you can as well find unmanaged VPSs starting at below $10, although they usually require a bit of server management know-how to run.
Google Cloud uses a similar pricing strategy to some VPS hosting providers. It charges yous per hour for the resource you lot use. For example, running a standard 1 CPU machine with 4 GBs of RAM costs $0.0475 per hour or $24.2725 per month.
At this price indicate, you're already in the aforementioned range as many managed WordPress web hosts. However, there'south a big divergence. Managed hosts frequently provide a very hands-off experience, where they take care of all advanced configuration for you lot. Google Cloud, on the other hand, gives you full command over your cloud.
Moreover, you can become some hefty discounts using Google Cloud if you know how to configure your machine. Plus, you can get gratuitous credits just by signing up – we'll cover this in the side by side department.
How to install WordPress on Google Cloud (in three steps)
Learning how to install WordPress on Google Cloud is a bit more than involved than with other spider web hosts. Still, it'due south non as intimidating every bit information technology might seem. Let's leap right in!
Pace 1: Deploy a WordPress instance
Before anything else, you'll need to sign upwardly for Google Cloud. Setting up your account should but take a few minutes. Once you lot have admission to your console, we recommend y'all verify the account using your bank or credit card.
Google Cloud offers a complimentary trial for its services and merely past verifying your account, they will give you $300 worth of credits to utilise for your projects:

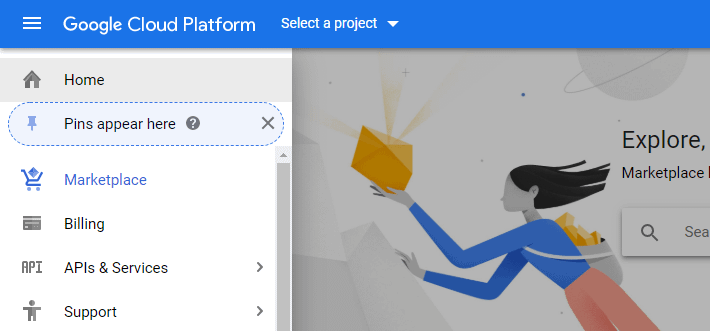
Whether y'all make up one's mind to sign up for a free trial or non, the residual of the process works much the same. Kickoff off, you should launch a new project by going to your dashboard and accessing the bill of fare to the left, then selecting the Market choice:
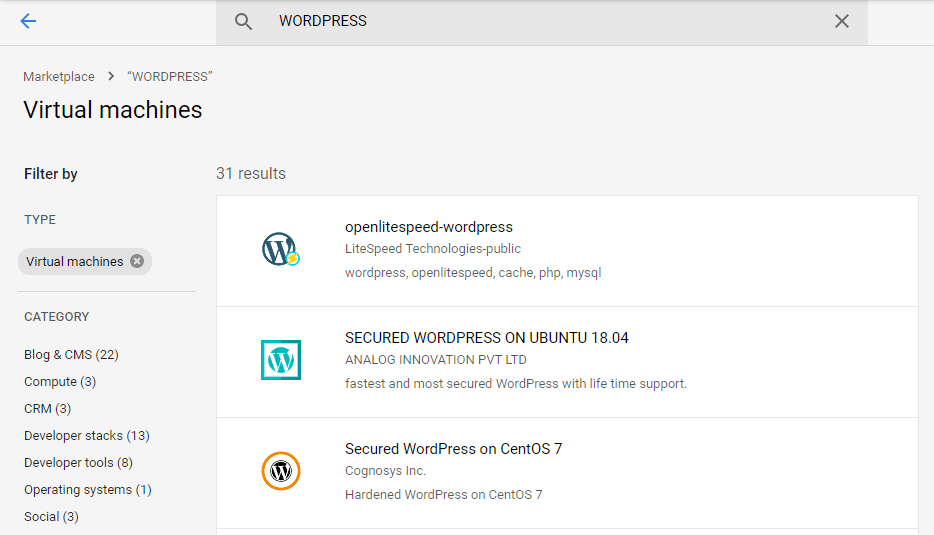
On the adjacent page, use the search feature to await for WordPress, which will requite you a list of fix-to-go WordPress configs yous tin deploy with a few clicks.
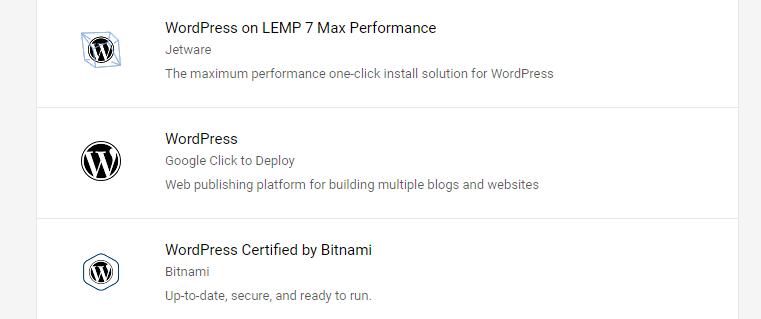
Scroll down until you discover the WordPress choice with Google Click to Deploy as its subtitle:
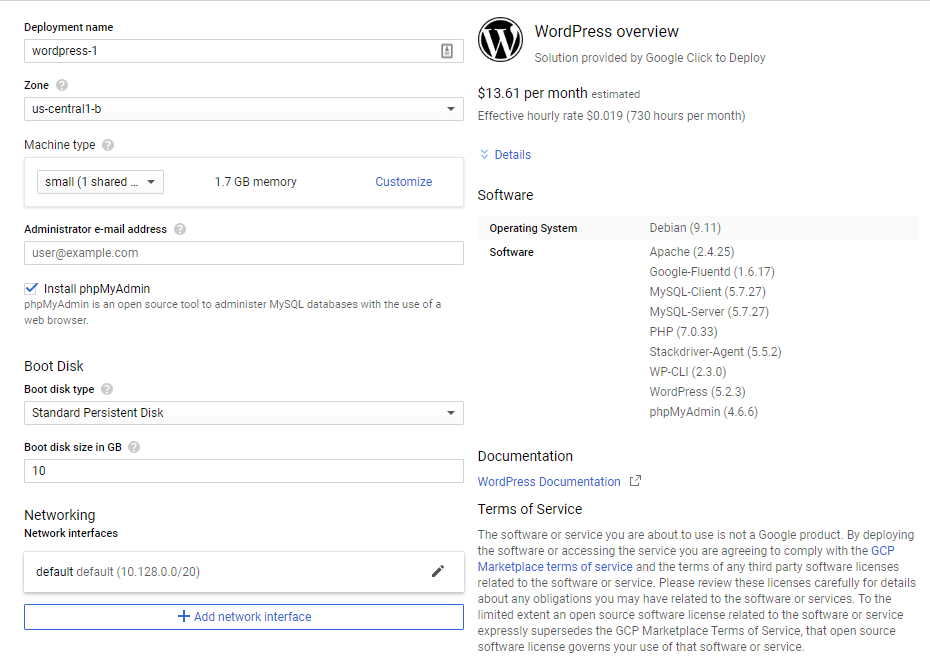
One time y'all select this, yous'll get an overview of estimated costs and what stack the parcel uses:
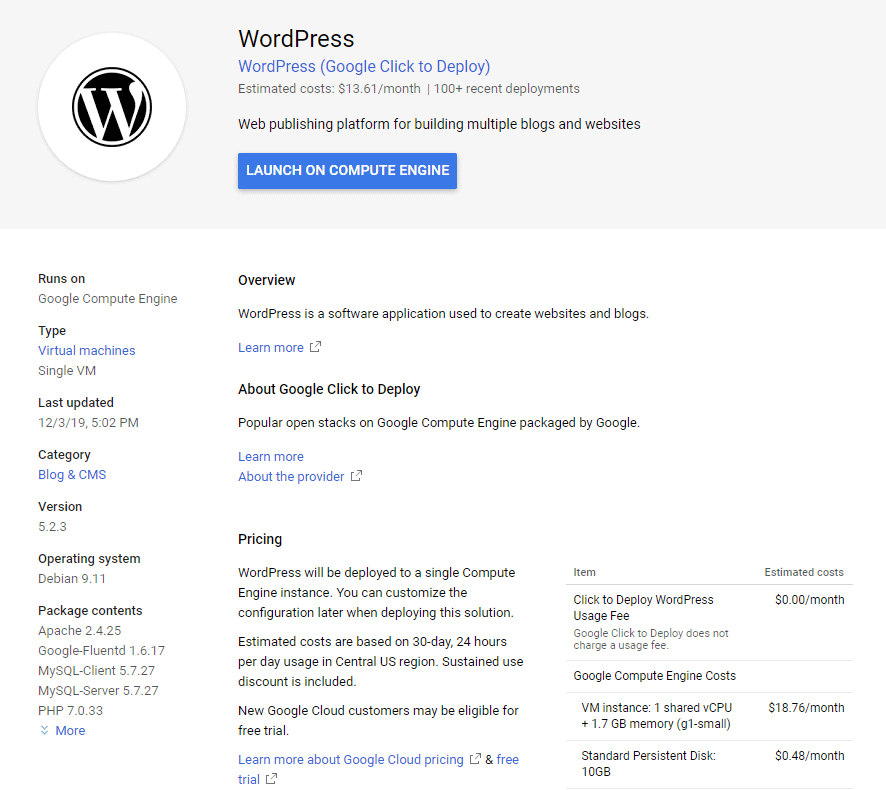
With this stack, you lot get 1 CPU and 2 GB of RAM, with an estimated price of approximately $xiii.61 per month (you become discounts for each month of full usage). This also includes x GB of storage, and information technology's plenty to run a website that gets a moderate amount of traffic without any difficulties.
When you're ready, click on LAUNCH ON COMPUTE ENGINE, then proceed to configure your setup.
Step ii: Create and configure your new project
Next up, Google Cloud will ask you to select a name for your new project:
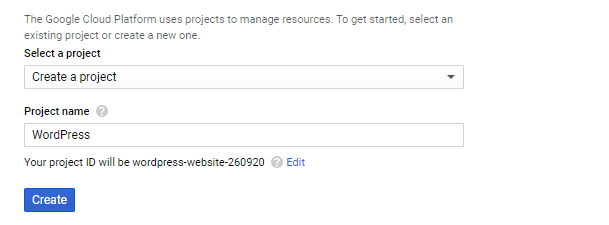
In one case you hit the Create button, give the service a few minutes to get everything set up.
While yous're waiting, you lot get the gamble to tweak the configuration for your new Google Cloud case.
In the last department, you saw some toll estimates. Now, y'all get the gamble to modify every setting, which can increase or reduce costs.
As a rule of thumb, you don't desire to employ less than 2 GB of RAM for your deject case. Also, the default configuration for this setup uses a shared CPU. If y'all're concerned about functioning, we recommend setting the Machine type to 1vCPU, which includes 3.75 GB of retentivity.
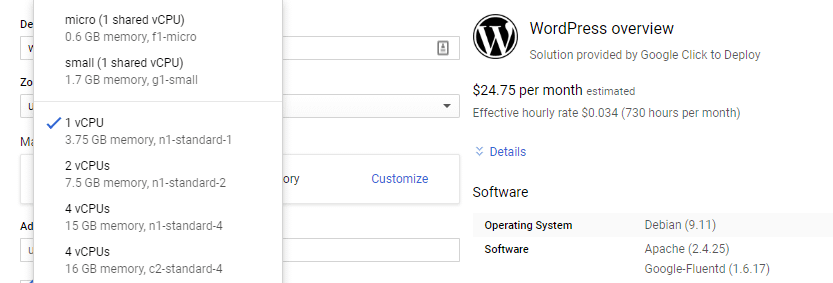
With this setup, you increase your monthly costs to $24.75 before discounts. We besides suggest you change the Boot disk type from Standard Persistent Deejay to SSD Persistent Disk, for increased operation:

The default 10 GB of storage should be enough for near websites. With this setup, your estimate should rise to almost $25.97 per calendar month.
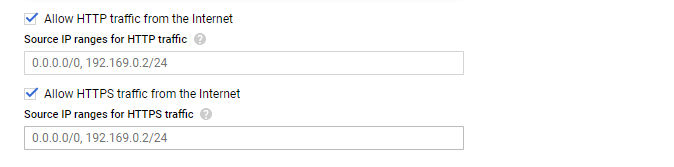
Before you proceed, make certain to:
- Choose a region for your server.
- Tick the Install phpMyAdmin option.
- Enable both HTTP and HTTPS traffic.
Now hit the Deploy button and wait for Google Cloud to do its matter, which can take a few minutes. In one case everything's ready, you can cheque out your new installation credentials from the deployment folio:
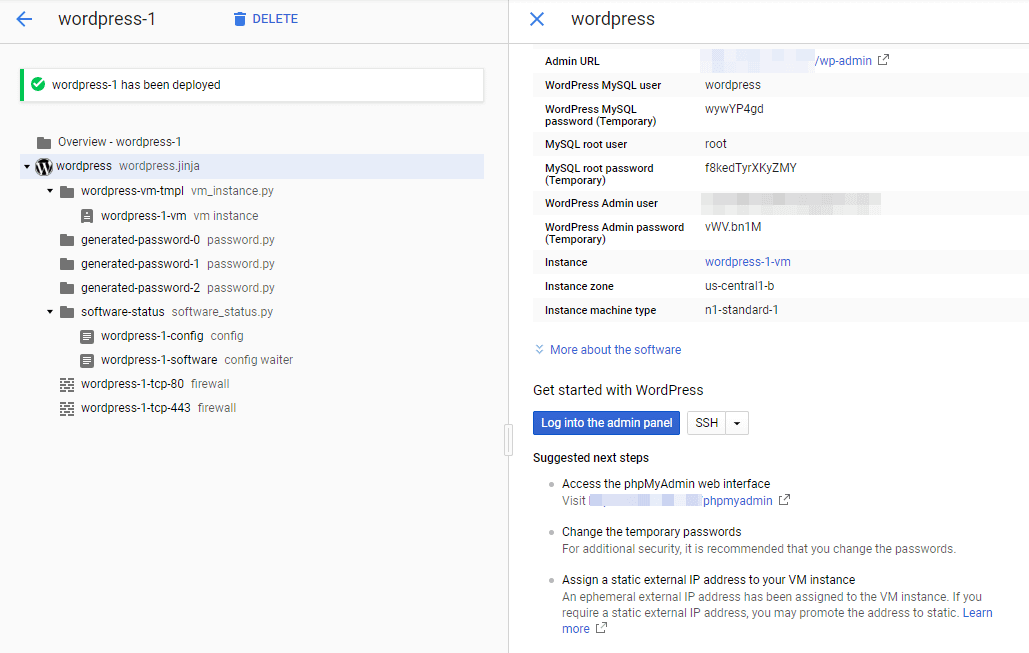
Note: This section includes your MySQL and WordPress admin users and passwords – you'll desire to alter those as soon as possible.
At this point, you're almost there. You but need to do a few more things earlier your website is ready for the public.
Footstep three: Map a domain and fix an SSL document
Your website is up and running on the cloud at present, only there are a couple of things y'all need to become over before calling it a day. Right now, your site is but accessible via an IP accost, so you'll want to map a custom domain to it as soon every bit possible.
If you don't have a domain yet, you can buy it from whatever domain registrar – here are some tips for picking a good one.
Next up, y'all need to set an SSL document for your website, given that you enabled HTTPS traffic for it. This stride isn't strictly necessary, but we feel very strongly most encouraging HTTPS use, every bit does Google.
After you take intendance of these tasks, continue an heart on your billing costs, to brand sure your free credits haven't run out. Once they do, Google Deject volition start charging your called payment method at the end of each month.
Conclusion
If y'all've only ever used 'traditional' hosting providers, trying out cloud services can be a big alter. The pricing model and hosting configuration options make this choice very different from others. Notwithstanding, using Google Cloud to host your WordPress website can pay off if you need highly scalable plans.
Hither'south how to install WordPress on Google Cloud, in three steps:
- Deploy a WordPress instance.
- Create and configure your new project.
- Map a domain and set an SSL certificate.
Do you have any questions almost how to use Google Cloud with WordPress? Allow'southward go over them in the comments department below!
Free guide
v Essential Tips to Speed Up
Your WordPress Site
Reduce your loading time past even 50-lxxx%
just past following simple tips.
Download gratuitous guide
Source: https://themeisle.com/blog/install-wordpress-on-google-cloud/
0 Response to "Change Upload Size Google Click to Deploy"
Post a Comment